Contents
- 1 Introduction: Importance of Knowing How to Jumpstart a Car
- 2 Step 1: Gather the Necessary Tools and Equipment
- 3 Step 2: Locate the Battery and Identify the Terminals
- 4 Step 3: Connect the Jumper Cables
- 5 Step 4: Start the Working Vehicle and Let it Run for a Few Minutes
- 6 Step 5: Attempt to Start the Dead Car
- 7 Step 6: Disconnect the Jumper Cables and Drive the
- 8 FAQs
- 9 Conclusion
Introduction: Importance of Knowing How to Jumpstart a Car
You never know when your car might decide to take an unscheduled break. It’s a situation that most drivers face at least once in their lives: the dreaded dead battery. Knowing how to jumpstart a car can save you time, money, and frustration. Whether you’re stranded in a grocery store parking lot or helping out a friend, having this skill under your belt is invaluable.
Jumpstarting a vehicle isn’t as daunting as it sounds. With just a few simple steps and the right tools, you can get back on the road in no time. So let’s dive into the essential steps for jumpstarting your car like a pro!
Step 1: Gather the Necessary Tools and Equipment
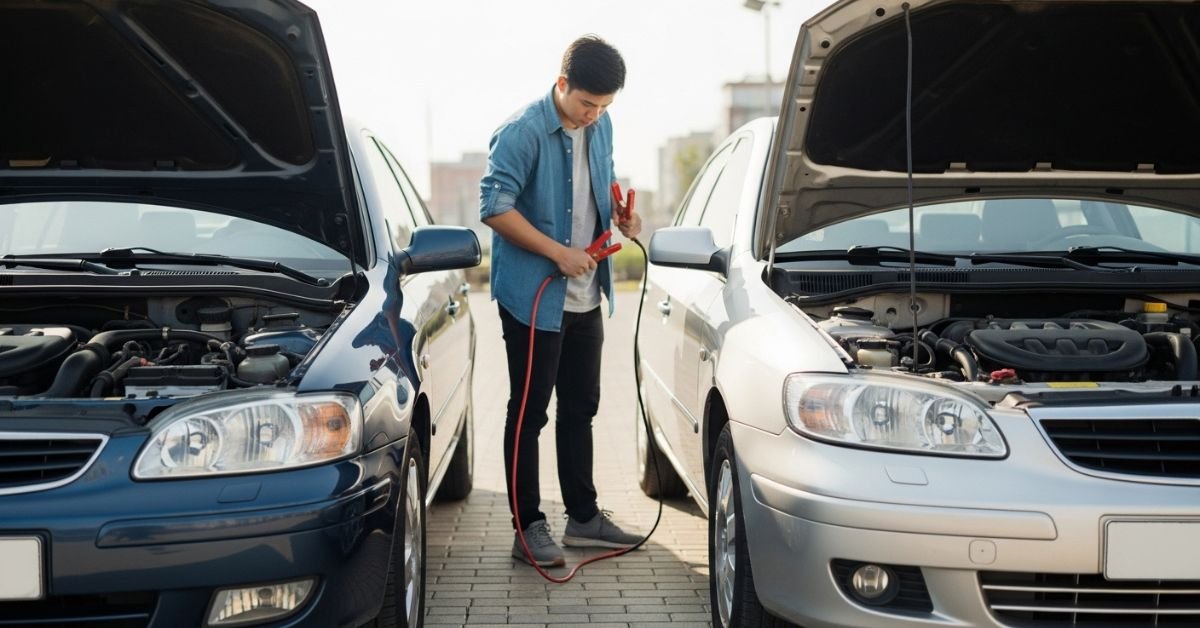
Before diving into the jumpstart process, make sure you have everything you need. The right tools can make a stressful situation much easier.
First and foremost, grab a set of jumper cables. These are usually color-coded—red for positive and black for negative. Look for a pair that’s at least 12 feet long; this will give you enough reach between vehicles.
Next, if possible, find a working vehicle with a compatible battery. This could be your own car or one from an understanding friend or stranger nearby.
Don’t forget safety goggles and gloves if you have them on hand. Protecting your eyes from any sparks is wise when dealing with batteries.
Keep your phone handy in case things don’t go as planned. Having access to help can ease tension during an unexpected hiccup in the process.
Step 2: Locate the Battery and Identify the Terminals
Now that you have your tools ready, it’s time to locate the battery. Most car batteries are found under the hood, but some might be in the trunk or beneath a seat. Make sure to consult your owner’s manual if you’re unsure.
Once you’ve located the battery, take a moment to identify its terminals. You’ll see two metal posts: one marked with a plus sign (+) and another with a minus sign (−). The positive terminal is usually red, while the negative one is often black.
It’s crucial to get this part right before proceeding further. Connecting cables incorrectly can cause damage or even injury. If there’s any corrosion on either terminal, clean it off carefully using gloves for safety. Being meticulous now will save you hassle later when you connect those jumper cables correctly!
Step 3: Connect the Jumper Cables
Now it’s time to connect the jumper cables. Start by taking the red cable, which is typically positive, and attach one end to the positive terminal of the dead battery. Make sure it fits snugly for a good connection.
Next, connect the other end of the red cable to the positive terminal on the working battery. This step is vital—double-check that you’re connecting to terminals correctly.
After securing both ends of the red cable, grab your black cable. Attach one end to the negative terminal of the working battery. Connect this last end to an unpainted metal surface on your disabled vehicle or its negative terminal if accessible.
This serves as a grounding point and reduces sparks during ignition attempts. Ensure all connections are tight before moving on—proper contact can make all the difference in getting that engine running smoothly again!
Step 4: Start the Working Vehicle and Let it Run for a Few Minutes
Once you’ve connected the jumper cables, it’s time to start the working vehicle. Turn the ignition key or push the start button. Listen for that satisfying roar of an engine coming to life.
After starting, let it idle for a few minutes. This allows its battery to transfer some charge into your dead battery. During this time, you can check your surroundings and ensure everything is safe.
Keep an eye on both vehicles while they run. It’s essential that no one accidentally touches the cables or gets too close to moving parts under the hoods.
If you notice any unusual sounds from either vehicle, address them before proceeding further. Patience pays off here; letting it run gives your dead battery a better chance at reviving fully.
Step 5: Attempt to Start the Dead Car
Now it’s time to give the dead car a chance to roar back to life. With everything connected properly, take a deep breath and turn the key in the ignition of your stalled vehicle.
Listen carefully. If you hear a clicking sound but nothing else, that means there’s still not enough juice getting through. Keep trying every few minutes; sometimes it takes a little longer for that energy from the working battery to flow into yours.
If the engine starts, let it run for a moment. This gives your battery some time to recharge. You might see dashboard lights flicker or hear other sounds as systems boot up again—these are good signs!
Should it fail entirely after multiple attempts? Don’t panic just yet! The issue could be deeper than just needing a jumpstart.
Step 6: Disconnect the Jumper Cables and Drive the
Once the dead car roars back to life, it’s time to disconnect those jumper cables. Carefully remove the cables in reverse order: start with the negative terminal of the revived vehicle, followed by the negative on the working battery.
Next, detach the positive cable from your car before taking off the other end from its source. This sequence helps prevent any short circuits and ensures a safe disconnection.
After everything’s unplugged, ensure that both cars are securely turned off for a moment. Take a deep breath; you’ve just accomplished something many find daunting.
Now it’s time to hit the road. Drive around for at least 15 minutes to recharge your battery fully. A little jaunt will also help avoid another dead battery situation soon after! Enjoy that newfound confidence behind the wheel as you cruise along.
FAQs
Got questions? You’re not alone. Many people wonder about jumpstarting a car and its nuances.
One common query is whether you can use any set of jumper cables. The answer is yes, but it’s best to opt for heavy-duty cables for more reliable connections.
Another frequent concern involves the safety of battery types. Most standard batteries are safe to jumpstart. However, if your vehicle has a gel or AGM battery, consult the manufacturer’s guidelines first.
You might also be curious about what happens if the dead car doesn’t start after several attempts. It could indicate a deeper issue beyond just a drained battery, perhaps something with the alternator or starter motor needs attention instead.
How long should you let the working vehicle run before trying again? Generally, five minutes works well to transfer enough power into the dead battery for it to potentially start up smoothly.
Read Our Latest Post!
Carpool Karaoke Mic – Features, Best Models & Buying Guide
Conclusion
Knowing how to jumpstart a car is an essential skill that can save you time and hassle in unexpected situations. Whether you’re stranded in a parking lot or helping a friend, the process is straightforward once you understand it. By following the steps outlined above, anyone can successfully revive a dead battery with confidence.
Always remember safety first: wear gloves if possible and avoid touching the clamps together when they’re connected to power sources. Regularly check your vehicle’s battery health and maintenance to prevent future issues.
Now that you’re equipped with this knowledge, you’ll feel more empowered on the road. Embrace this handy skill—it might just come in handy when you least expect it!


